The last nail has been hammered in. The paint has dried, the fixtures are in place, and the final tools have been packed away. After weeks or months of hard work, the construction project is finally complete.
But then you step inside.
There is a fine layer of dust on the countertops. The windows are covered in fingerprints. Sawdust sits in the corners, adhesive residue marks the floors, and the newly installed cabinets need a thorough wipe-down.
The building may be finished, but is it ready for the client?
For contractors in Salem, Oregon, this is where post-construction cleaning makes all the difference. A professional final clean helps transform a newly built or renovated property from a completed construction site into a clean, presentable space ready for its next stage.
Whether you are preparing a residential home for its new owners or getting a commercial property ready for inspection and handover, this post-construction cleaning checklist will help you keep the final details from being overlooked.
Why Post-Construction Cleaning Matters
Construction work leaves behind more than the obvious mess. Fine dust can settle on surfaces throughout a building, while paint splashes, caulk residue, packaging materials and fingerprints can detract from an otherwise excellent finish.
Leaving these details unattended can affect the property’s presentation and create additional work before the final walkthrough.
For contractors, a thorough cleaning process helps to:
-
- Present the finished project professionally.
-
- Prepare the property for inspection, photography or handover.
-
- Remove construction residue from appropriate surfaces.
-
- Make it easier to identify finishing details that need attention.
-
- Give clients a better first impression of the completed work.
The Post-Construction Cleaning Checklist
A good cleaning plan follows a logical sequence, moving from dirt removal and high surfaces to detailed cleaning and final floor care. The exact scope will depend on the property’s condition, the materials used and the contractor’s requirements.
1. Remove Remaining Construction Dirt
Before detailed cleaning begins, inspect the property and remove loose dirt that can be safely handled.
Checklist:
-
- Collect loose packaging, cardboard and other non-hazardous waste.
-
- Remove leftover protective coverings where appropriate.
-
- Pick up loose dust, sawdust and small construction debris.
-
- Check corners, closets and areas behind accessible fixtures.
-
- Confirm that tools, unused materials and contractor equipment have been removed.
-
- Arrange appropriate disposal for waste that requires special handling.
This initial step creates a safer, more manageable space for the detailed cleaning that follows.
Remember that hazardous materials, sharp debris and potentially contaminated dust require appropriate handling. Ordinary cleaning procedures should not be used to manage materials that need specialist removal.
2. Clean Ceilings, Walls and High Surfaces
Dust does not always settle where you expect it to. It can accumulate on light fixtures, ceiling fans, vents, door frames and other elevated surfaces, then fall onto freshly cleaned areas.
Checklist:
-
- Remove accessible dust from ceiling surfaces and corners.
-
- Dust light fixtures and accessible fittings once they are safe to clean.
-
- Wipe suitable door frames, trim and ledges.
-
- Clean vents and grilles externally.
-
- Spot-clean washable wall surfaces where permitted.
-
- Check for cobwebs and visible dust buildup.
Always follow the manufacturer’s cleaning recommendations for painted walls, delicate finishes, electrical fittings and other sensitive materials.
3. Clean Windows, Glass and Window Tracks
Few things diminish the appearance of a newly completed property as quickly as dusty windows and streaked glass. Clean glass allows natural light to highlight the finished space, while dirty tracks and frames can make even new windows look neglected.
Checklist:
-
- Remove dust and fingerprints from accessible interior glass.
-
- Clean window frames using suitable products.
-
- Vacuum or remove loose debris from window tracks.
-
- Wipe sills and ledges.
-
- Remove suitable construction residue using methods approved for the glass and surrounding materials.
-
- Check mirrors, glass doors and other interior glass surfaces.
Avoid scraping glass with unsuitable tools or attempting to remove hardened residue without confirming that the method is safe for the glass. Exterior windows and high-level glazing may require specialist equipment or a separate service.
4. Deep Clean the Kitchen
In a newly built or renovated home, the kitchen deserves particular attention. Dust can settle inside cabinets, on countertops, around appliances and along the edges of newly installed fittings.
Checklist:
-
- Wipe countertops with products suitable for the surface material.
-
- Clean cabinet exteriors and accessible interiors.
-
- Remove dust from drawers and shelving.
-
- Clean sinks, taps and surrounding surfaces.
-
- Wipe appliance exteriors and interior areas included in the agreed scope.
-
- Clean backsplash surfaces and suitable splash zones.
-
- Remove fingerprints from cabinet handles and hardware.
-
- Check corners, edges and areas around kickboards.
Different countertop materials, including natural stone and specialty finishes, may require specific products. Always confirm the appropriate cleaning method before applying chemicals or abrasive tools.
5. Scrub and Sanitize Bathrooms
Bathrooms often reveal the small details that distinguish a rushed clean from a thorough one. Dust may collect around fittings, while grout haze, adhesive residue and packaging marks can remain on newly installed surfaces.
Checklist:
-
- Clean and disinfect toilets using appropriate products.
-
- Clean sinks, taps and vanity surfaces.
-
- Wipe mirrors and glass shower screens.
-
- Clean showers, bathtubs and suitable wall surfaces.
-
- Remove loose debris from drains and corners.
-
- Wipe cabinet exteriors and interiors.
-
- Clean around fixtures and hardware.
-
- Check for visible grout haze or construction residue requiring specialist treatment.
-
- Restock supplies if this is included in the service agreement.
New tiles, stone surfaces, grout and plumbing fixtures can be sensitive to harsh chemicals. Use compatible products and allow disinfectants the required contact time when disinfection is part of the scope.
6. Clean Doors, Handles, Switches and Other Touchpoints
After the main surfaces have been cleaned, attention should turn to the details people notice as they move through the property.
Checklist:
-
- Wipe doors and door frames.
-
- Clean handles and hardware.
-
- Remove fingerprints from switch plates.
-
- Wipe handrails and banisters.
-
- Clean skirting boards and baseboards.
-
- Check corners, trim and other visible finishing details.
Electrical fittings should be cleaned safely, using methods appropriate for the surface. Never spray liquids directly onto switches, outlets or electrical equipment.
7. Remove Dust from Floors and Finish with the Right Method
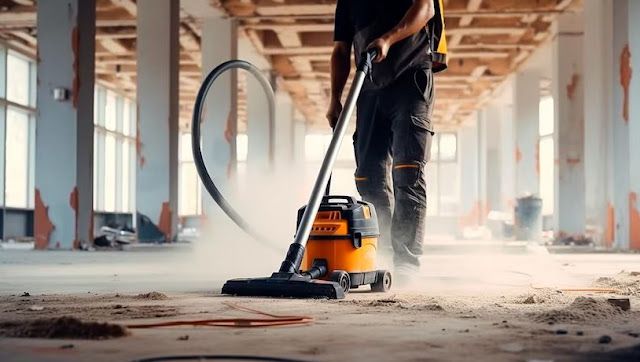
Floor care should happen after overhead and surface cleaning to reduce the risk of dust settling on an area that has already been finished.
Different flooring materials require different approaches, so the cleaning method should always match the manufacturer’s recommendations.
Checklist:
-
- Remove loose debris before vacuuming or washing.
-
- Use suitable equipment to collect fine dust.
-
- Vacuum carpets and other floor coverings.
-
- Sweep or vacuum hard floors as suitable.
-
- Damp-mop compatible flooring using the correct cleaning solution.
-
- Remove marks without damaging the finish.
-
- Clean floor edges and corners.
-
- Inspect the floor under good lighting for streaks, residue or dust.
Avoid excessive moisture on wood, laminate and other moisture-sensitive floors. Fine construction dust can also require filtration and equipment, particularly when large quantities are present.
8. Clean Bedrooms, Living Areas and Other Rooms
Once the main cleaning tasks are complete, inspect each room individually. A systematic room-by-room approach helps prevent small areas from being overlooked.
Checklist:
-
- Dust shelves, ledges and built-in storage.
-
- Wipe closet shelves and rails.
-
- Clean interior doors and handles.
-
- Check window sills and tracks.
-
- Remove dust from fixtures.
-
- Inspect fitted furniture and built-in units.
-
- Check each room for fingerprints, streaks and debris.
-
- Clean floors and corners.
If the property includes multiple bedrooms, offices or separate living spaces, use a room-by-room checklist to record completion and identify any areas requiring another pass.
9. Inspect Entryways, Hallways and Shared Areas
Entryways and hallways receive considerable attention during a walkthrough. They are often the first areas a client sees, so their condition can shape the overall impression of the property.
Checklist:
-
- Clean the main entrance and door surfaces.
-
- Remove dust from trim and ledges.
-
- Clean interior glass near entryways.
-
- Vacuum or mop floors using an appropriate method.
-
- Check stairs, handrails and landings.
-
- Remove remaining packaging and loose debris.
-
- Confirm that walkways are unobstructed.
For commercial projects, include shared corridors, reception areas and other agreed spaces. Where multiple trades are still working on-site, coordinate cleaning to avoid repeating work or exposing cleaners to unnecessary risks.
10. Complete the Final Walkthrough
The final inspection is your opportunity to catch the details that may have been missed during cleaning.
Walk through the property as though you were the client seeing it for the first time. Look at the space from different angles and check surfaces under good lighting.
Final inspection checklist:
-
- Check all rooms against the agreed scope of work.
-
- Look for dust on horizontal surfaces and ledges.
-
- Inspect glass for streaks and fingerprints.
-
- Check floors for residue, marks and dust.
-
- Confirm that bathrooms and kitchens are presentable.
-
- Verify that agreed cleaning tasks have been completed.
-
- Record any outstanding issues outside the cleaning scope.
-
- Confirm that the property is ready for the next stage.
A final walkthrough also helps distinguish cleaning issues from construction defects or unfinished work. For example, a scratch on a new fixture may require the contractor’s attention rather than another round of cleaning.
When Should You Schedule Post-Construction Cleaning?
Timing matters. Cleaning too early can mean repeating the work if contractors are still sanding, painting, installing fixtures or moving materials through the building.
For many projects, the best approach is to coordinate cleaning after dust-producing construction and finishing activities have been completed, the site is safe to enter, and the contractor has confirmed that the property is ready.
Depending on the project, cleaning may take place in stages:
Rough clean: Removes loose debris and prepares the property for subsequent work. It should be coordinated with the construction schedule.
Detailed clean: Focuses on dust, residue, glass, fixtures, cabinets and other surfaces after major construction activities have finished.
Final touch-up: Addresses dust or marks that appear after inspections, installations or other trades have returned to the property.
Not every project requires three separate visits. The right arrangement depends on the property’s size, condition, construction schedule and agreed cleaning scope.
For Salem contractors managing multiple deadlines, discussing the cleaning plan early can help prevent last-minute delays.
Make the Final Clean Part of Your Project Plan
Construction involves many moving parts, from managing materials to meeting client expectations. The final clean deserves the same level of planning as the rest of the project.
A comprehensive checklist gives contractors a practical way to track the work, but larger projects may require professional equipment, additional labour and specialized cleaning methods to achieve the required finish.
For contractors in Salem, Oregon, working with an experienced cleaning partner can help take that final task off an already busy schedule.
Let Flourish Contractors Help You Get the Job Ready
You’ve put time, skill and effort into completing the project. The final presentation should reflect that work.
At Flourish Contractors, we provide professional post-construction cleaning for residential and commercial properties in the Salem area. We help prepare completed spaces for their next stage, whether that means a final walkthrough, property presentation or handover.
Instead of trying to fit every cleaning detail into an already demanding construction schedule, let our team help you plan the final clean.
Have a project nearing completion?
Visit Flourish Contractors to learn more about our services, or request a quote for your upcoming project.